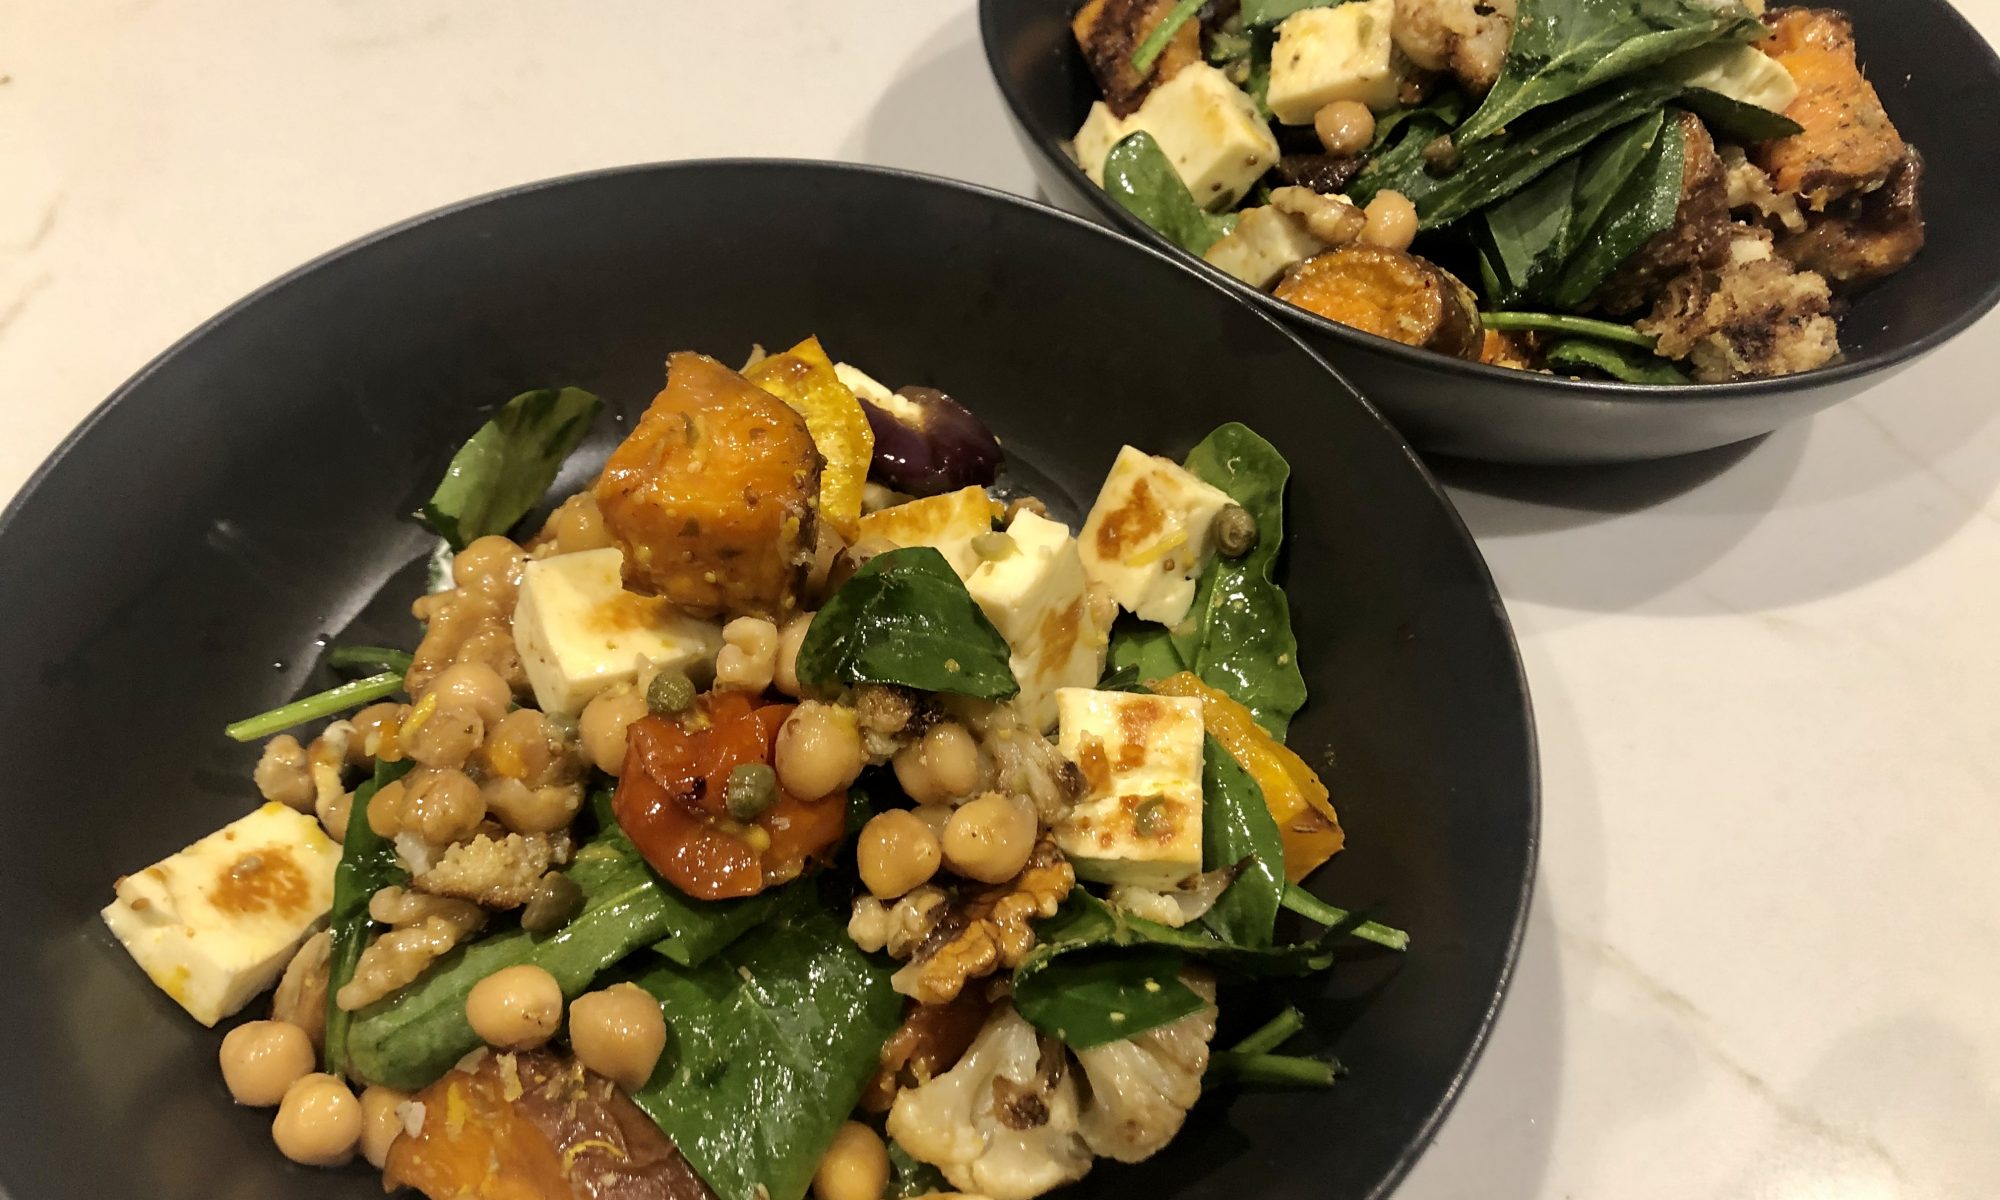
Boost your salad game and brighten up your meal (and your day!) with the vibrant colours and flavours of this warm roasted vegetable, chickpea and haloumi salad with candied walnuts. Nutritious, full of flavour, and perfect for leftovers. Great thing with this salad is, the vegetables can be altered based on what you have in the fridge, and haloumi can be subbed for tofu, tempeh (keeping it vegetarian or taking it vegan) or add another protein of your choice. Add this one to your meal rotations, and you will have a delicious lunch or dinner on the menu that’s super easy to prepare.
Roasted Vegetable, Chickpea and Haloumi Salad
Vegetables for roasting of your choice. If you have these pre-roasted, makes dinner prep even more simple!
My favourites (but really any veggies go!):
- 1/2 Butternut Pumpkin, chopped ~2cm pieces
- 1 large Sweet Potato, chopped ~2cm pieces
- 1/4-1/2 Cauliflower, chopped into florets
- 1 Red Onion, quartered length ways
- 1 punnet Cherry Tomatoes
- Olive Oil
- 1 tbsp Dried Oregano (or herb of choice)
Other Ingredients
- 1 large Handful Baby spinach leaves
- 1 small Bunch flat-leave parsley, roughly chopped
- 1 400g can Chickpeas, drained and rinsed
- 250g Haloumi, thickly sliced (you could sub for tofu, tempeh or even a protein of choice etc)
- 1 large Handful Walnuts, slightly chopped
- 1/2 tbsp Honey / rice malt syrup
For the dressing
- 1 tbsp Baby capers, drained, roughly chopped
- 1/2 Lemon – finely grated zest + the juice
- dash Water (as needed)
- 60 ml Olive Oil
- 1 tsp Dijon OR wholegrain mustard
For the roasted Vegetables
Preheat oven to 180deg. Place all the vegetables (excluding tomatoes) evenly on a lined baking tray, drizzle with olive oil and sprinkle with dried herbs and season with S&P. Cook for ~20-30min
Add the tomatoes to the tray, drizzle with oil and return all vegetables to the oven for another ~20min or until potato, pumpkin and cauliflower are tender, onion is golden and tomatoes softened. (note you may need to take out some vegetables before others – so keep an eye on them)
For the Haloumi & Walnuts
Heat frypan and over medium heat throw in the walnuts and drizzle with the honey/rice malt syrup and a sprinkle of salt. Keep an eye on it and toss as needed, but let bubble away until honey/rice malt syrup starts to caramalise.
In the same frypan, cook haloumi on each side until golden.
Pull it all together
Grab a large serving bowl and put everything in, pour over the dressing and toss gently.
Pop it in the middle of your table, grab a bowl and 'serve yourself' and enjoy ! 🙂
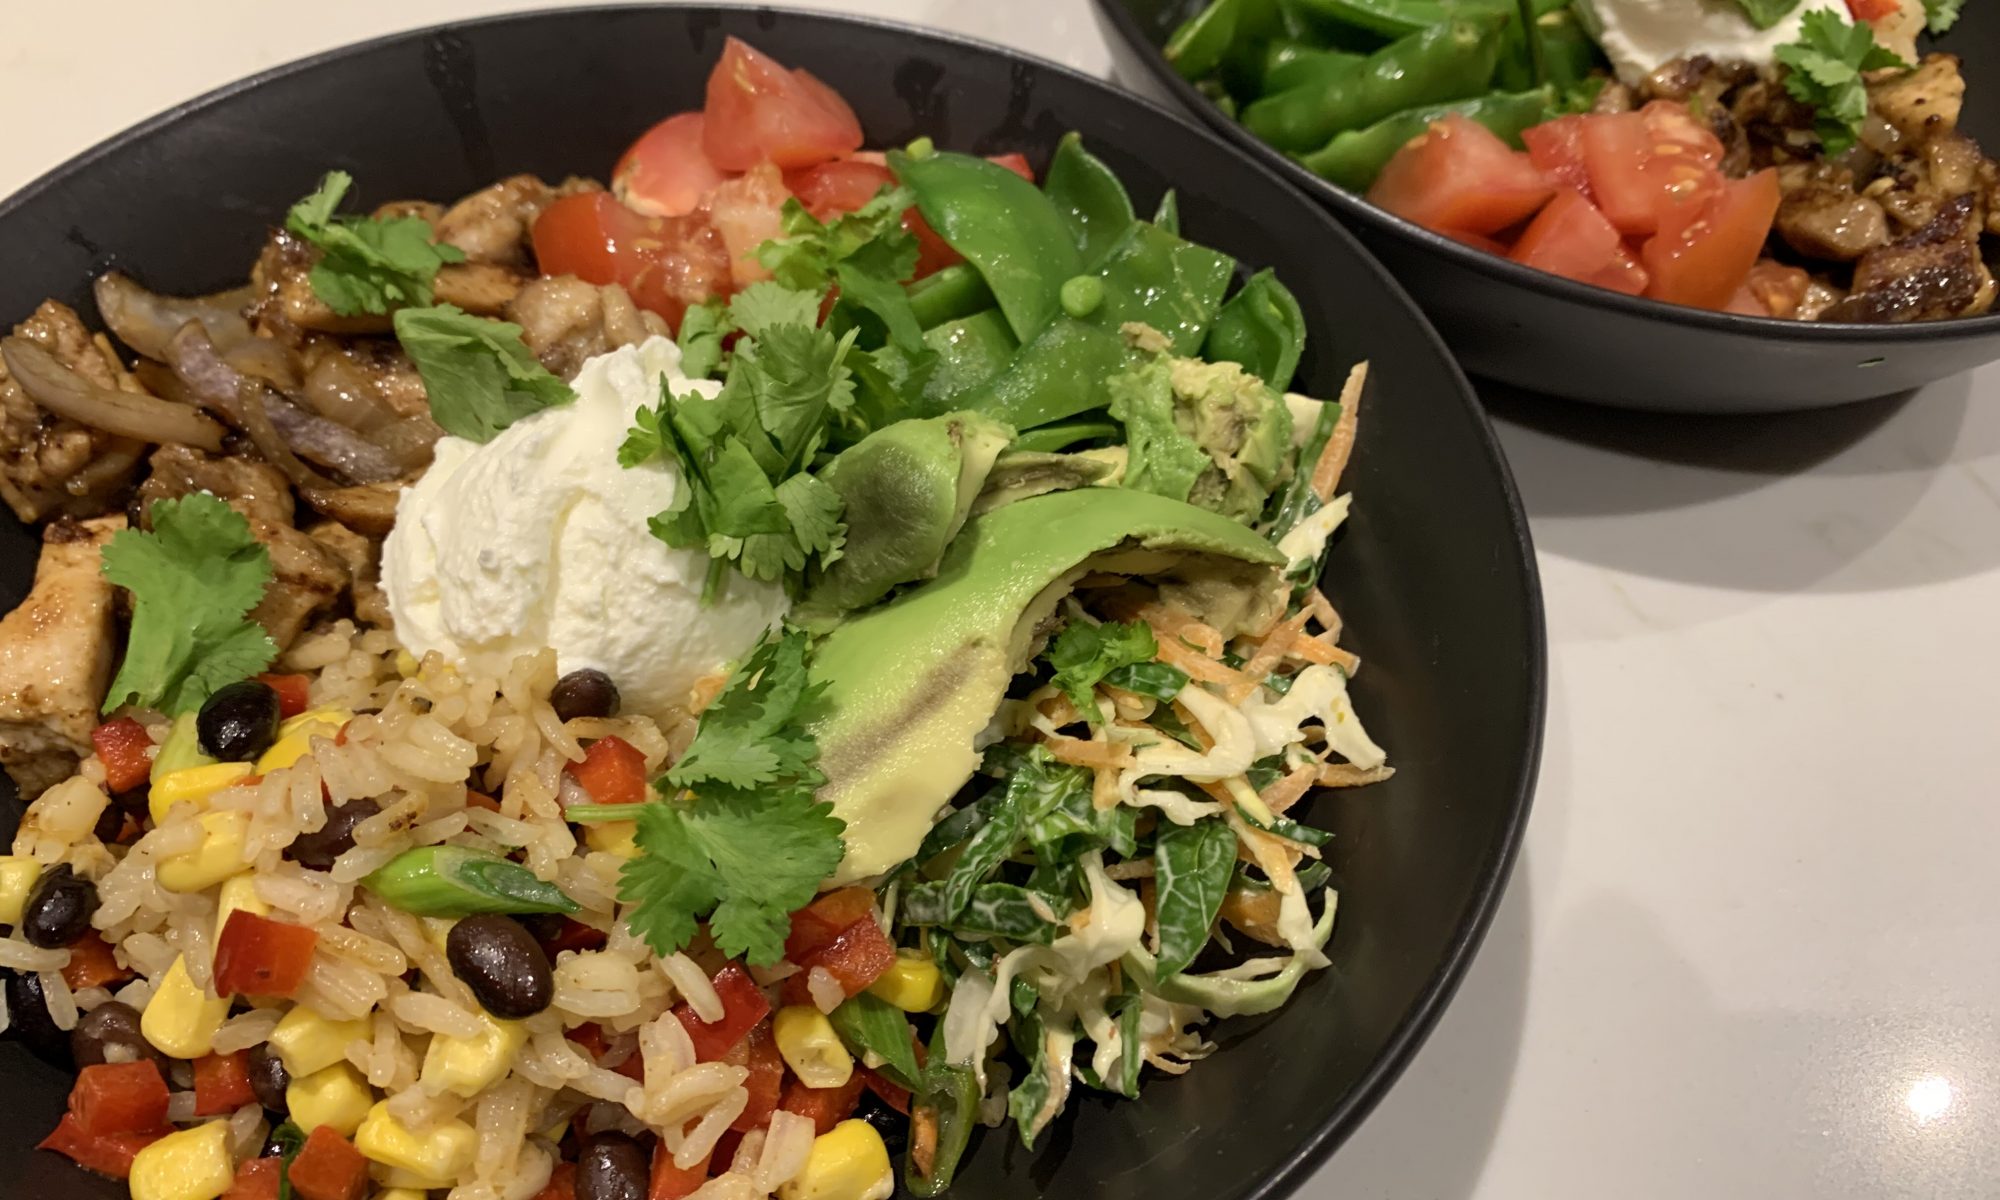
A simple ‘throw together’ meal for a help yourself / build your own Bowl that can be prepped ahead of time. Any ingredient can be easily substituted for something else – including the protein you choose, so is an easy go to when you have random veggies left in the fridge. This will be be one of your favourite ‘go to’ meals.
Mexican Burrito Bowl
Prep Time 20 minutes mins
Cook Time 10 minutes mins
Course Main Course
Cuisine Mexican
For the black bean rice
- 1 cup Washed rice of choice
- 2 Garlic cloves minced/chopped
- 1 tbsp Olive Oil
- 1/2-1 tin Black beans
- 2 cups Bone broth / stock and/or water
- 1/2 tin Corn (or fresh corn) (omit if you prefer)
- 2 Spring onions chopped
- 1 tsp ground cumin
- 1/4 Capsicum chopped the same size as beans/corn
- 1/4 tsp Cayenne pepper
For the Mexican Spiced Chicken
- 3-500g Chicken thigh, chopped small (you can easily substitute for any meat / protein here such as beef, tofu, tempeh, salmon – anything goes!)
- 1 tbsp Olive Oil
- 1 tsp Ground Cumin
- 1/2 tsp Cayenne Pepper
- 1/2 tsp Sweet Paprika
- 1 tsp Ground Turmeric
- 1 tsp Ground Coriander
- (don't stress too much about the spices, a little more, a little less, something a little different – no worries! Just ensure you include some 'heat'
For the raw slaw
- Good handful of sliced cabbage
- Good handful of sliced spinach or kale
- 1 Carrot grated
- 1/2 tbsp Good quality mayonnaise
- 1/2 tsp Wholegrain mustard
- 1 tbsp water
Additional bow ingredients
- 1 Chopped tomato
- Equivalent in sliced cucumber
- Cooked snowpeas (optional)
- Chopped avocado
- Greek Yoghurt
- Fresh Coriander
For the Black Bean Rice
In a saucepan over medium heat, heat half the oil then add the garlic and saute for 2-3min
Add the rice and stir through for a further 2min
Add your liquid / broth and cook ~15min (add a little extra liquid if needed / not quite cooked)
Take off the heat and stir through the remaining ingredients, including the remaining oil. Pop into a bowl for serving.
For the Mexican Spiced Chicken
Mix all the spices in a small bowl and then pop in a zip lock bag (or bowl if you prefer) with the chicken and coat thoroughly.
Heat up the oil in a pan to medium- high and drop in the chicken. You want it nice and hot the chicken spread out so it gets a little crispy. Cook until done. Then pop in a bowl for serving
For the raw slaw
Chop up the cabbage, spinach and grate carrot
Mix the dressing ingredients in a bowl or jar
Just prior to serving, pour the dressing over the veggies and mix through, s&p to taste
Additional bowl ingredients
Put the additional ingredients in bowls and then lay everything out on the table for a 'help yourself' / 'build your own' mexican bowl. Any left overs can be enjoyed the next day too! ENJOY !
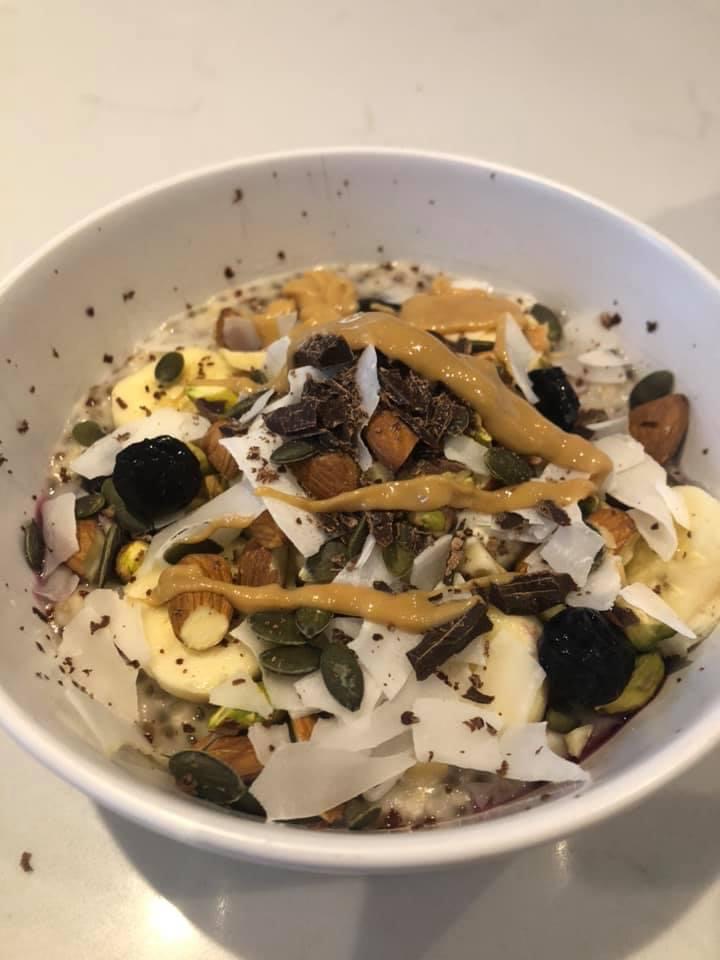
There’s nothing like a big warm, filling bowl of oats in winter, and even more so after a hard training session. Load it with all the trimmings and you have a well rounded, nutritious, post training meal. So next time you feel like a warming breakfast, grab this recipe to pimp up your bowl of porridge.
Loaded Oats & Chia Porridge
Prep Time 5 minutes mins
Cook Time 10 minutes mins
Saucepan or thermomix
stove top (or thermo)
- 1/2 CUP Organic Rolled Oats
- 1 tbsp Chia Seeds
- 1/2 cup Coconut Milk (or milk of choice)
- 1 cup Boiled Water adjust as needed
- Sprinkle of cinnamon
- TOPPINGS:
- 1 tbsp Yoghurt (I like Greek or coconut)
- 1 tbsp Mix of pepitas and sunflower seeds
- 1 tbsp Nuts of choice (I like almond flakes, pistachios and/or macadamias)
- 1/2 tbsp Flax meal
- 1/2 Banana (optional)
- Small handful of fresh or frozen berries (I like blue berries)
- Coconut flakes
- Peanut Butter
- Chopped Dark Chocolate (optional extra!) 😉
Pop the oats, chia seeds, cinnamon, milk and boiled water into a saucepan and let sit. I like to do this pre-session/in advance so it's ready to cook when I finish. You could also do the night before and pop into the fridge.
When ready to cook, top up with a little extra water and/or milk and cook on low until it's smooth and creamy.
Pour the oats into a bowl and then top with all the toppings. Add a little extra milk.
Sit down and enjoy your warm bowl of goodness!
Keyword post training fuel
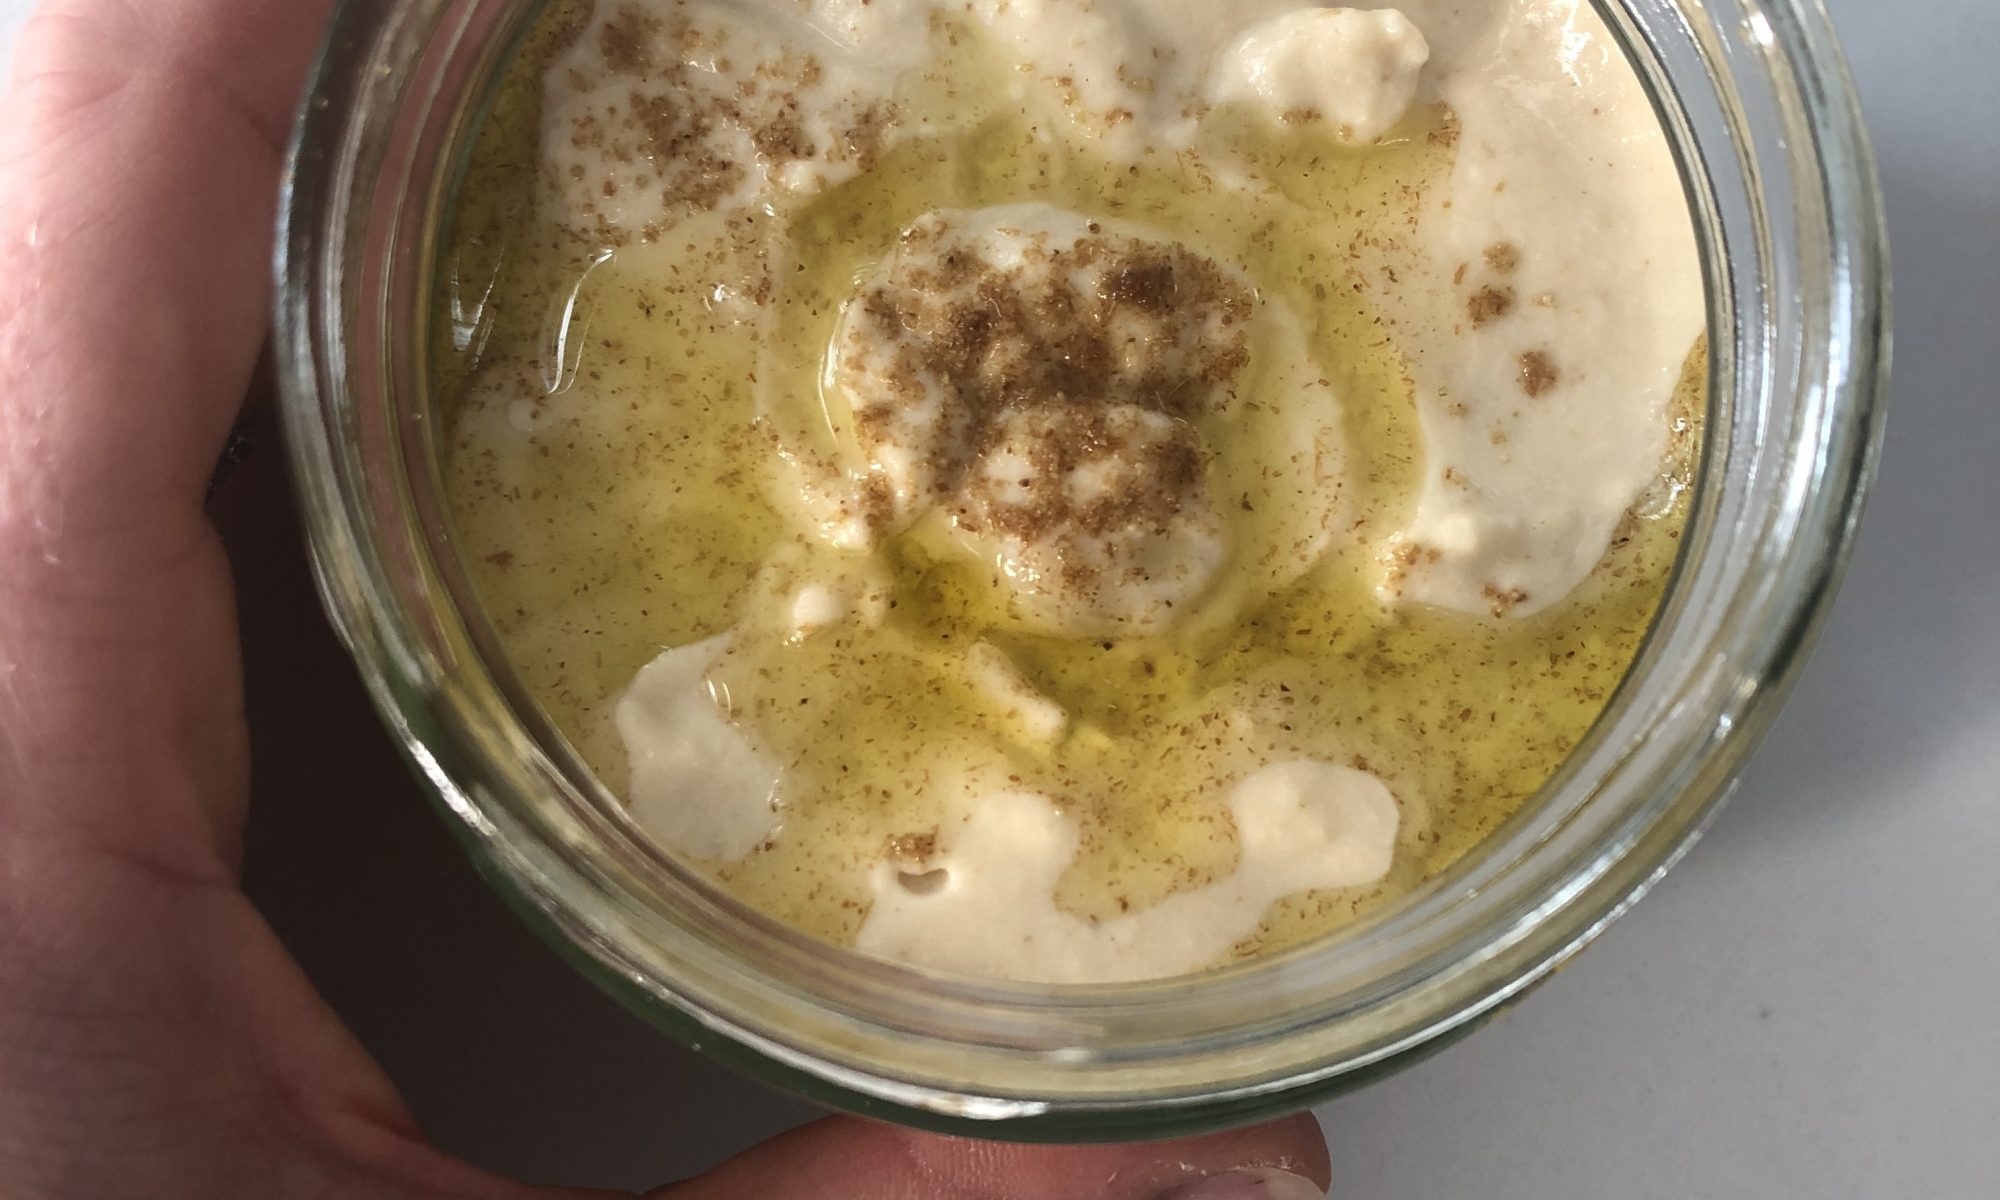
Once yu make your own hommus, you will realise you have been wasting your money on store bought! Hommus is SO easy to make, and you can adjust flavours to your taste. Give it a go! A great staple condiment to have in the fridge to add to just about any dish or as traditionally eaten as a healthy and nutritious dip.
Homemade Hommus
Prep Time 10 minutes mins
blender/ food processor
Jar to store
- 1 tin Canned organic chickpeas
- 1 Small garlic clove roughly chopped
- 1 tbsp tahini
- 1 good squeeze of fresh lemon
- 1 pinch salt (optional)
- 1/2 tsp cumin
- 1 tbsp olive oil
- 2-3 tbsp iced/cold water
- 1/2 tsp paprika (to serve)
Blend lemon juice, garlic and salt and let sit for 5min to allow the garlic to mellow
Add tahini and blend
Slowly add cold water while blending
Add cumin and chickpeas and blend
While blending, slowly add olive oil
Add more water if needed
Taste and adjust flavour to taste. Ie more cumin, lemon juice, salt or cumin
Transfer to a jar and add a lug of olive oil on top to keep it fresher for longer.
Keep in the fridge for up to a week.
Add a sprinkle of paprika on top when serving
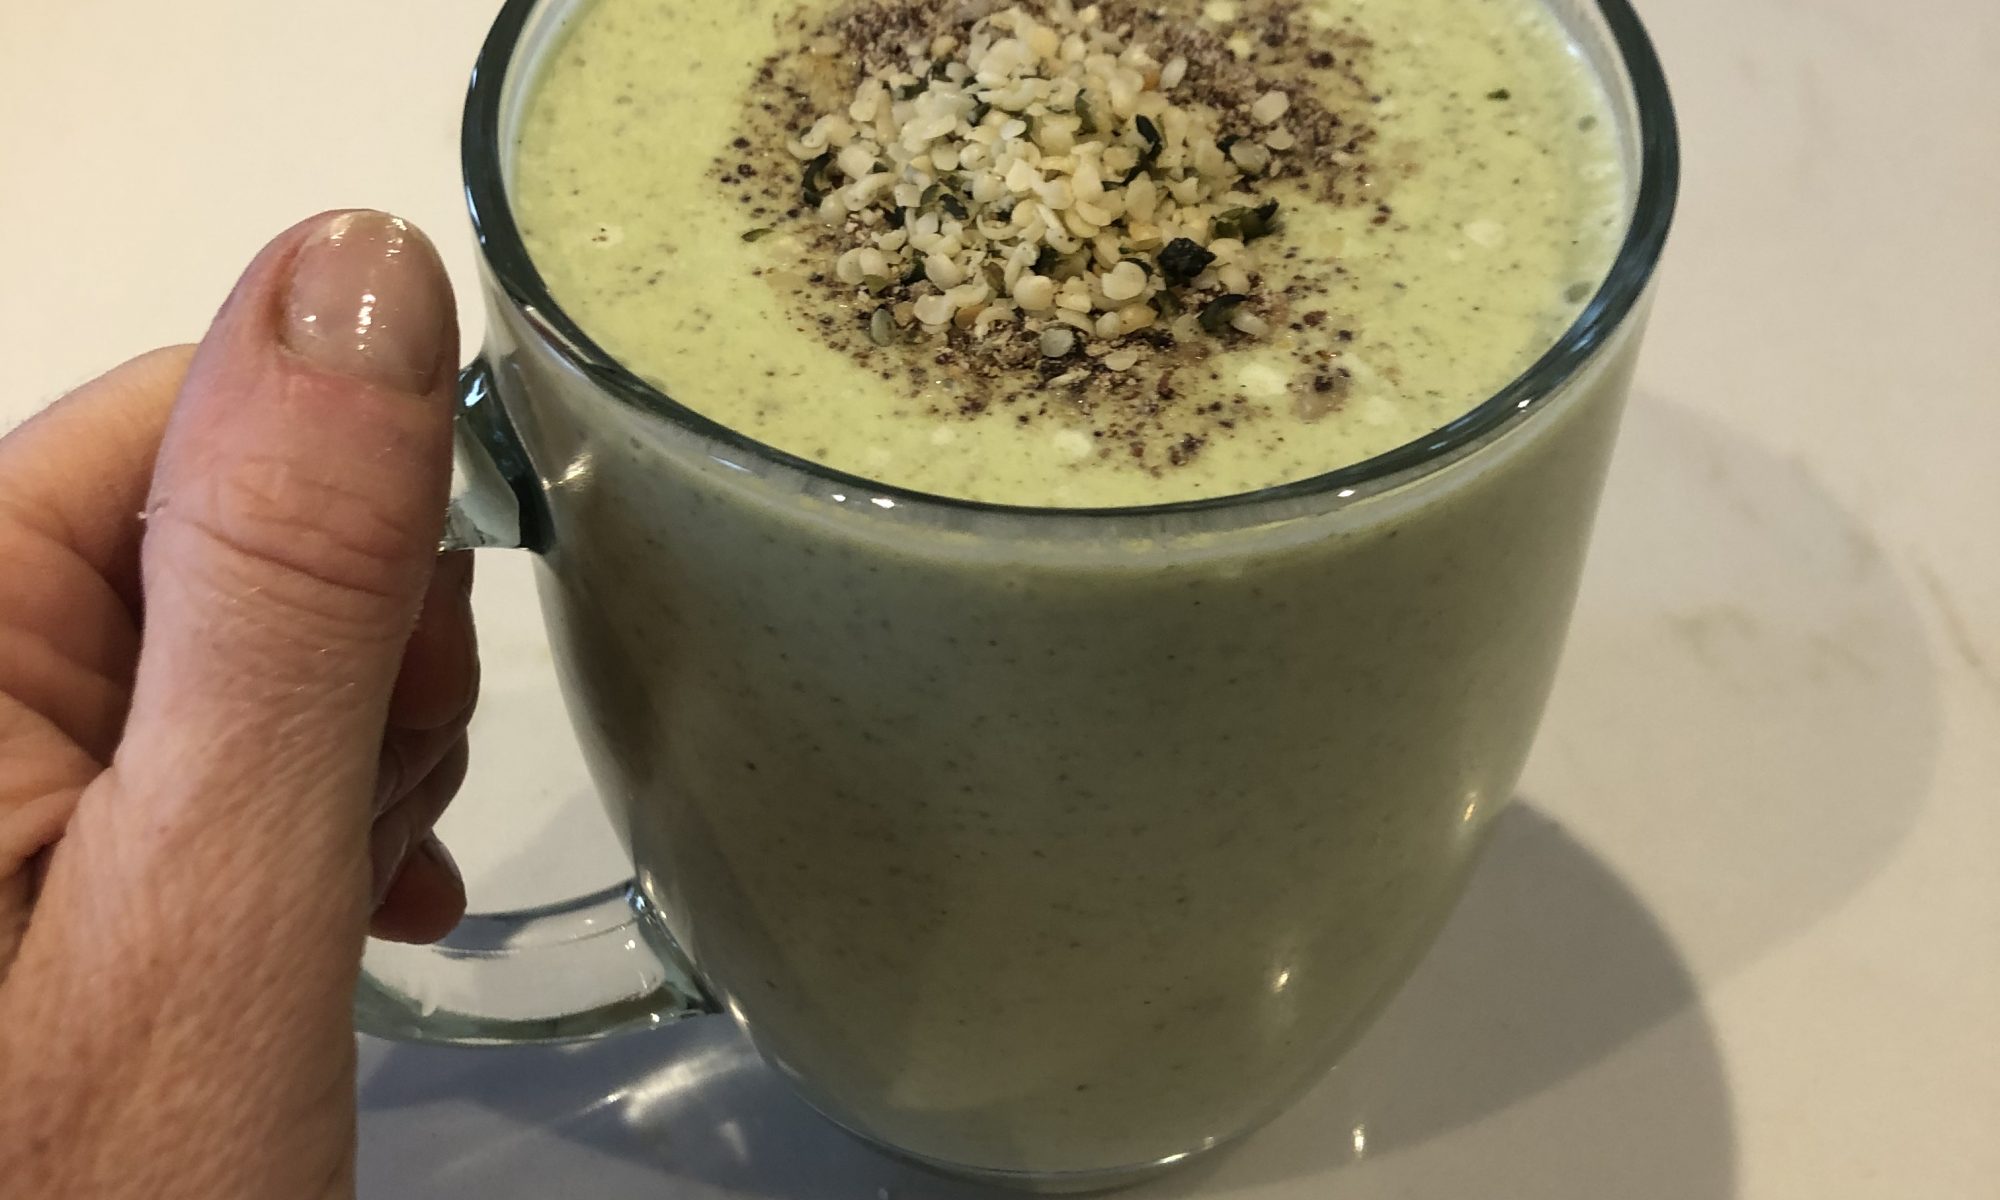
If you are looking for a smoothie packed full of goodness and tastes delicious then this is it. You can adjust the measurements to your own taste and/or what you have on hand. There’s no hard and fast rule with smoothies! You will learn what you like and simply measure to feel and adjust as you like. So measurements are a guide only, but a great base to start. To make smoothies easier too, you can prepare in advance and have ‘servings’ already ready in the freezer. So you can simply grab out the container/bag and throw it in your blender, then grab your pantry and fridge items and blend. I’m all about efficiency! 🙂
Green Protein Power Smoothie
- 1/2 cup coconut milk (or milk of choice) (if you prefer, you can omit and just at more water)
- 1/2 – 1 cup cold water (adjust as needed)
- 1 fresh or frozen banana (frozen creates a thicker consistency) If you don't like banana, replace with 1/2 avocado but want your smoothie smooth and silky
- 1 handful ice (the more you include, the thicker your smoothie)
- 1 tbsp yoghurt of choice (I like Greek or coconut)
- 1 handful fresh spinach or kale or serve of frozen
- 1/2 stalk celery
- ~4cm cucumber
- 2 florets broccoli (fresh or frozen)
- 1 dollop peanut butter (or nut butter of choice)
- 1 tbsp chia seeds
- 1 serve good quality protein powder (optional)
- 1 tsp rice malt syrup / maple syrup
- 1 serve collagen (optional) (I like nutra organics: https://nutraorganics.com.au/products/collagen-beauty
- OPTIONAL TOPPINGS: for extra texture/crunch: flaxmeal / LSA, hemp seeds, dark chocolate/cacao nibs, shredded coconut, almond flakes (anything goes!)
Literally throw everything into a high power blender and blitz until smooth. Adjust liquid as needed. Add more liquid if you like it thinner or more ice if you want it thick and creamy and to eat with a spoon! ENJOY!